Seeking an answer to your question?
This section is dedicated to providing answers to some of the frequently asked questions.
This section is dedicated to providing answers to some of the frequently asked questions.
1. What is Mizdah and how does it work?
Mizdah is a platform that allows users to conduct virtual meetings, conferences, and collaborations through video and audio communication. It works by connecting participants in real-time, enabling them to see, hear, and interact with each other using their devices.
2. How to register in Mizdah?
Go to the official website of the Mizdah (www.mizdah.com ) or download the app available in both Windows and MacOS version.
Click on “Sign Up” button on the right top corner of the homepage.
Enter your First name and Last name, Email Address and Password (create a secure password).
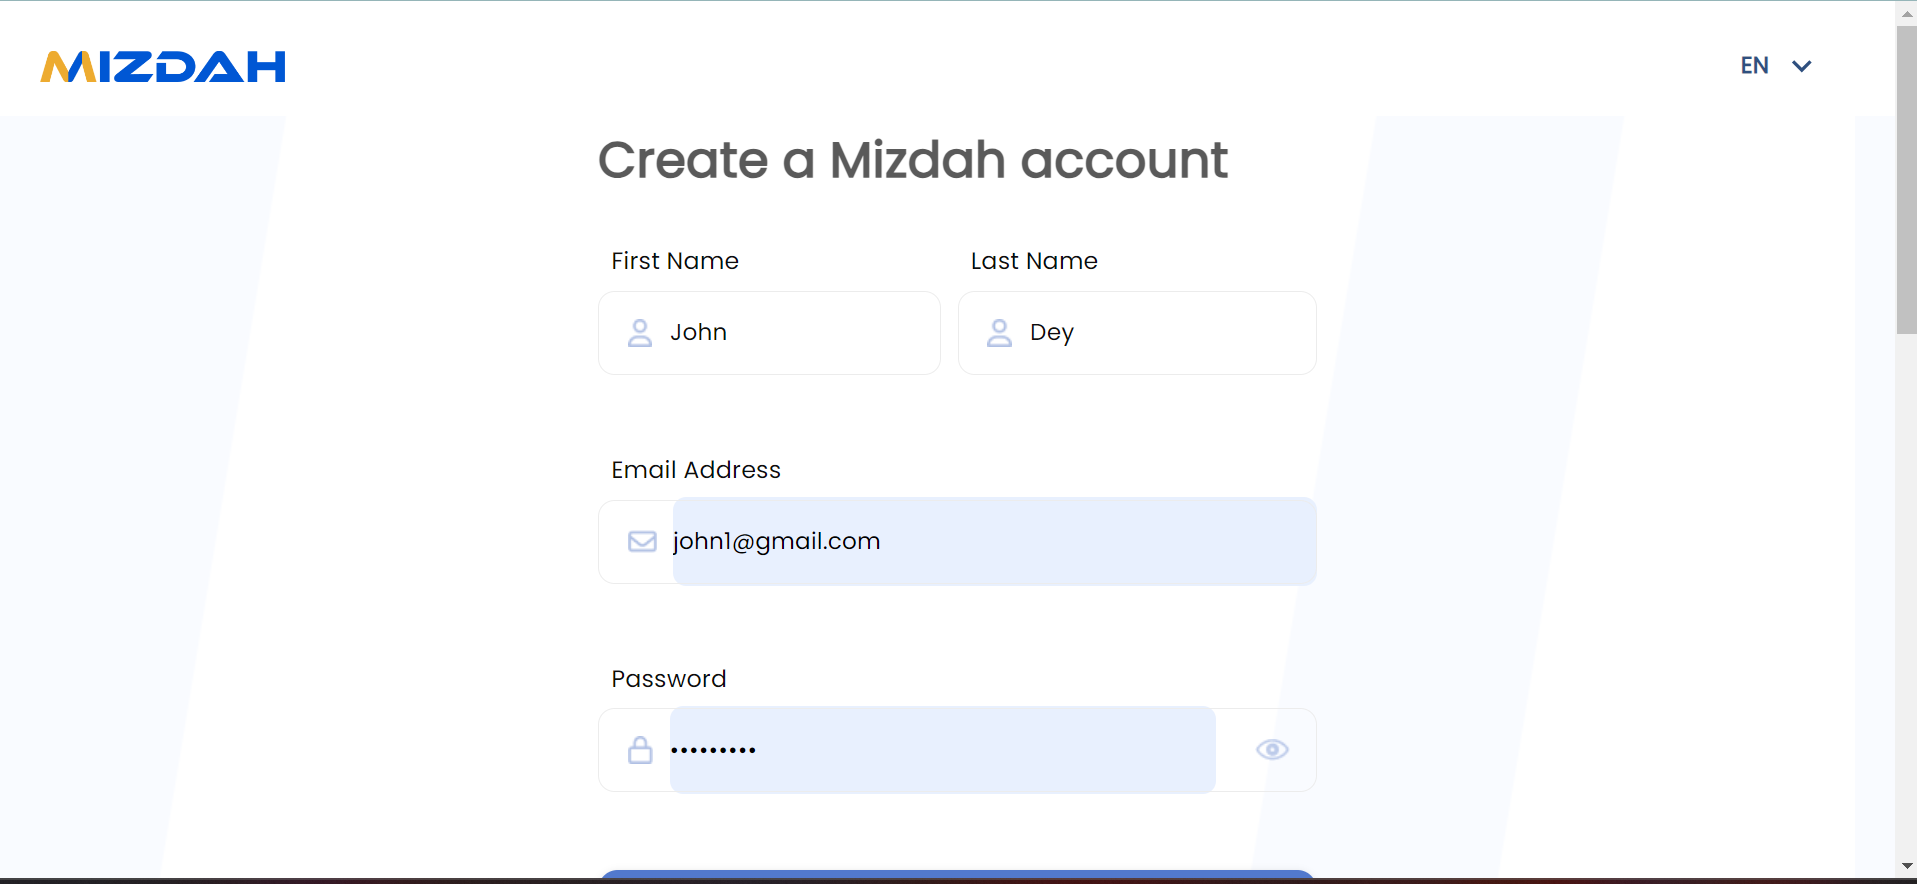
Click on blue colored ‘Sign-Up’ button to create your account.

3. How to Sign in Mizdah?
Go to the official website of the Mizdah (www.mizdah.com) or download the app available in both Windows and MacOS version.
Click on “Login” button on the right top corner of the homepage.
Enter your Email Id and Password.

Click on ‘Sign In’ button to login on your account.
4. How to add contacts in Mizdah?
First login to Mizdah.
In the Mizdah homepage, Look for “My Contacts” options on the top and click on it .

Click on “+” icon near My Contacts.

Click on “Search Contacts”.

You can search contacts , By selecting “Search by Name or Search by Email”.

Click on “+” icon to add contacts on your list.

Then, click on ‘Add’ button.
5. How to create a group on Mizdah?
Users on Mizdah can create a group and add participants to it for collective communication. To create a group, follow the following steps:
First login to Mizdah.
In the Mizdah homepage, Look for “My Contacts” options on the top and click on it.
Click on “+” icon near My Contacts.
Click on “Create Group” option.

Now, set your Group Photo, Group Name and Add Group Members.

Click on “Create” blue colored button to create your group.

To add/modify a group name, click on the pencil icon to the right of the group name and use the name of your choice.
6. How to add/delete Group members?
To add or delete group members you can directly go to “groups”.

To add members to the group, enter the name of the person you wish to add. Mizdah will give you a list of people who match with the name you enter. Click on + next to the name of the person you wish to add to the group. Repeat this process for every person you wish to add to the group.
The person you added to the group will receive an email notification that they have been added to the group and group name.

When removing a member, click on Remove from Group, you will be prompted to confirm that you want to remove the member. That particular member will be removed from the group. No email notification will be sent to the person you removed from the group.
Click on “Edit Group”

Enter name or email of a user on the search bar below ”Add Group Members”.

Click on ”Save” button to add members.

You can directly go to “groups”.
Select the user you want to remove or delete from the group. Click on ellipses icon the given contact.

Click on “Remove from Group” to delete the contact from the group.

7. How to edit profile on Mizdah?
Click on the account dashboard on right top corner. Here you can manage your account details.

In the account settings, click on the ‘Profile’ option on the top.

Click on ‘Upload Profile Photo’ to change your profile picture.

To make changes in your profile, click on ‘Edit Profile’ option.

Modify your First Name and Last Name.

Update your company name in the given space.

Then, enter your job title.

Set your Time Zone.

Update your contact number.

Enter your Location on the given space.

Then click on “Update Profile” button to save your updated information.

8. How to schedule a meeting on Mizdah?
Open the Mizdah website (www.mizdah.com) or open your computer-based version of Mizdah and log in to your Mizdah account using your registered email address and password.
Once logged in, now click on the “Schedule” ![]() icon option or “Schedule Meeting” on the top of the page.
icon option or “Schedule Meeting” on the top of the page.

You’ll be presented with a form to fill out the meeting details.
Enter a descriptive title for your meeting, which will serve as the meeting’s name.

Now, enter your meeting details or attach files required for your meeting in ‘Description’ section.

Select the date for your meeting by clicking on “Start Date“. You can choose the date from the calendar.

Select time and set your meeting duration by clicking on “From” and Duration options.

Ensure that the time zone matches the location of your meeting. Select your Time Zone according to your location.


Invite or add participants by clicking on “invite by Contact” icon.
To invite participants by My Contacts, enter the name of an individual you want to invite to the meeting, then click on the + next to the person’s name and finally click to confirm his participation.
Mizdah can automatically assign a password for every meeting scheduled. The host can also assign a password id required.

Enter participant name or email id on the given space.

Click on ‘Confirm’ button to invite selected participants in your meeting.

Set your security options.by updating your Password. Set Request permission on join, set your Privacy, set who can start.

Set your meeting controls by setting Enable audio, Enable video and Enable chat.

Set your ‘Screen Sharing’ option, by selecting who can share the screen and How many participants can share screen at a time.

Allow ‘Breakout Rooms’ option by clicking on toggle.

Then Click on blue colored “Schedule Meeting” button to confirm your schedule meeting.

9. How to share your screen during meeting ?
In the meeting controls toolbar, Click the ‘share screen”  icon.
icon.

Now you will have an option to select your entire screen, a specific application, or a specific browser tab.

Click “share” button to begin sharing your screen with other participant.

To stop screen sharing When you’re done presenting, click on ”stop sharing” on your screen.

10. How to add virtual background and filters?
In the meeting controls toolbar, look for video icon on bottom left corner and click the “up arrow” icon to change your video background.

After clicking on up arrow icon, you will get an option to “change or burr your video background”.

Click on “Change background” to add virtual background to your meeting.

Now you can select a new background from preloaded backgrounds available , it will automatically change in the meeting.

11. How to record meetings?
As a host, you can record your meeting by following these steps.
In the meeting controls toolbar on bottom right corner , look for ellipsis icon ![]() and click on it.
and click on it.

After clicking on ellipsis icon, dropdown menu get open.

Now, click on “Record” icon to start recording.

As a Host, when you start recording , you’ll see an indicator in the Mizdah meeting window to show that the session is being recorded.

Participants will be prompted to consent to being recorded.

To stop the recording, click on “ellipsis icon” ![]() , and then click on “Stop recording“.
, and then click on “Stop recording“.

12. How to Assign Breakout Rooms for Group Discussions?
In the meeting controls toolbar, look for “Breakout Rooms” icon and click on “Breakout Rooms” button.

Choose the number of breakout rooms you want to create.

Also, You manually assign participants to rooms or have Mizdah automatically assign them evenly.

Now, click on “Create” button to Create breakout rooms.

If you choose to manually assign participants, you’ll see a list of participants. Drag and drop their names into the desired breakout rooms.

Click the “Open All Rooms” button to send participants to their respective breakout rooms.

As the host, you can jump between breakout rooms to monitor discussions or assist.

To join a room, click the “Join” button next to the room name in the breakout rooms panel.

You can manually close them by click on end icon when the discussions are complete.

13. How to Use Whiteboard feature?
In the meeting controls toolbar, Look for “White Board” icon and click on it.

It will open a new window or panel for the whiteboard.

Use the drawing tools provided by the whiteboarding feature to draw, write, or annotate on the whiteboard canvas. Common drawing tools include pens, pencils, highlighters, shapes, text boxes, and erasers.

To end the whiteboard, click on X icon.

14. How to block participant from your contact list?
Look at the top for “My Contacts” button and click on it.

Go to “All Contacts” option and click on it to get the listof all the contacts.

Now select the user or contact which you want to block and click on it.

On the right side look for ellipses icon  and click it.

Choose “Block Contact” option , so that user won’t be able to find your contact on Mizdah.

15. How to view blocked participants on Mizdah?
Go to “Privacy and Security “ section, and look for “View Blocked Accounts” option

Click on side arrow to see the list

Now you will see the list of all the blocked users,

If you want to unblock any contact or user, just click on “Unblock” button.

16. Can I customize my virtual background?
Yes, Mizdah allows you to upload or choose virtual backgrounds during a meeting.
In the meeting controls toolbar, look for video icon on bottom left corner and click the “up arrow” icon to change your video background.
After clicking on up arrow icon, you will get an option to “change or burr your video background”.
Click on “Change background” to add virtual background to your meeting.
Now you can select a new background from preloaded backgrounds available , it will automatically change in the meeting.
17. Is there a maximum duration for meeting?
Mizdah has 60 minutes duration for basic plan. The duration is more for the other plans.

18. How do I ensure the privacy of my meetings?
Look for privacy settings such as meeting password protection, waiting rooms, and the ability to lock a meeting once it starts. These features help control access and enhance privacy.
During the time of scheduling your meeting , you can set your meeting password on the ‘Security Option’ Section to secure your meeting from unknown participant.

The host has an option to make the meeting private rather than public. This gives enhanced privacy and limits who can start the meeting.
Enable ‘ Request permission on join ‘ . whenever a new participant want to join your meeting, you will receive a request notification.

When “Request permission to join” is set, a participant is held in the waiting room until the host gives him/her the permission to join.
19. Which languages are supported for user interfaces in Mizdah?
There are Many languages supported by Mizdah platform like english, hindi, arabic, french, turkish, russian, japaneese, fillpino, armenia, greek etc .
20. How can I provide feedback or report issues?
To give any suggestion or report an issue , just go to user settings section.

Click on ‘Report a problem’ option.

To provide any suggestions or feedback, click on ‘Suggest an Idea’ option available.

Enter your suggestions on the given space provided and you can also upload a screenshot.

To update the problem which you are facing , click on ‘Report an issue’.

Enter the problem or issue , which you are facing under the space given.

After updating, to submit the issue click on Send button.

21. Is Mizdah free to use?
Yes, Mizdah offers a free basic plan with essential features such as video calls, audio calls, and screen sharing. However, there are also premium plans available with additional features, higher participant limits, and enhanced security options.
22. Which devices are compatible with Mizdah?
Mizdah is compatible with a wide range of devices, including smartphones, tablets, laptops, and desktop computers. You can use it on both iOS and Android devices, as well as Windows and macOS operating systems.
23. How many participants can join a video call?
The number of participants depends on your subscription plan. The free plan typically allows a limited number of participants, while premium plans offer higher participant limits. Check our pricing page for detailed information on participant limits for each plan.

24. Is Mizdah secure?
Yes, security is a top priority for us. Mizdah employs encryption protocols to secure your meetings and data. Additionally, we regularly update our security features to protect against emerging threats. For more details, please refer to our security policy.
25. How can I troubleshoot common issues during a video call?
If you encounter issues during a call, such as poor audio or video quality, check your internet connection or restart the app. If problems persist, contact our support team for assistance.
26. Can I use Mizdah for personal as well as business meetings?
Yes, Mizdah is versatile and can be used for both personal and business purposes. The app offers features suitable for various scenarios, including virtual gatherings, family meetings, and professional conferences.
27. Are there any system requirements for using Mizdah?
To ensure optimal performance, make sure your device meets the minimum System Requirements. Mizdah is compatible with modern web browsers and devices with updated operating systems.
28. How to set user Privacy and Security and Notifications?
Firstly go to Mizdah dashboard.

Click on ‘down’ arrow on the top right corner to get the ‘dropdown’ option.

Then, click on ‘User Settings’ option.
Now, click on Privacy and Security option to set your privacy and security.

Enable ‘Hide me from Appearing in other searches’. This option will help your profile to not appear on searches and users will not be able to send you an add
request and add you as a contact.

Set your Profile Visibility such as Profile Photo, Email Address, Phone Number, Company, Job Title and Location to ‘Everyone, My Contact or Only Me’ and click on ‘Continue’ button.

Click on Notifications option on the left side.

Enable the given options to get notifications Such as New Add Requests , Reminders before meetings start, Meeting has started , Meetings have been cancelled or updated and click on Save button to confirm your changes.

29. How to use Meet Now?
Open the Mizdah application or web portal.
Go to Homepage of Mizdah and Look for Meet Now button left side and click on it to start your meeting instantly.

Or in homepage , look for Meet Now on the top and click on it.

Now, you will get an option to Enable or Disable your Video and Audio.

Choose your preference from enable or disable the Video and Audio and click on Join button to start your meeting instantly.
 You can invite any participant in the Meet Now meeting by clicking on the Copy Link icon and sharing it with them.
30. Ways to join a meeting (app home page and email invitation)?
In the Mizdah homepage, click on the “Join Meeting” button.

After clicking on “Join Meeting” , enter your Meeting ID.

Enter the meeting password. The password is available in the meeting invitation.

After Entering the password, now join the meeting by clicking on “Join Meeting”.

Enable your video and audio option and click on ‘join’ button.
You can also directly join the meeting by clicking on the link provided by the host through email.

31. How to launch a Group meeting?
Go to Mizdah dashboard first.

Click on ‘My Contacts’ on the top of the dashboard.
Then, click on the ‘Groups’ option on the left side.

Click on the group from available groups, with whom you want to launch the meeting.

If you want to start meeting instantly, click on the ‘Instant Meeting’ option.
You can also schedule your meeting by clicking ‘Schedule Meeting’ option.
Fill the above form according to your requirement and click on the ‘Schedule Meeting’ blue colored button to confirm your schedule meeting.


32. How to use Chat?
To use ‘Chat’, you need to first start a new chat by selecting the person you want to chat with (select the person, hit + then Add). This initiates the chat request to the selected person. Once the person responds to the chat request, they will show up in your list of Chat Requests. You can then click on it to open the window where you can send messages and attachments.

If you want to start a new chat, select the contact, with whom you want to initiate a chat as shown below.

After selecting the contact, Enter your message and click on the send button.
You can also attach any file or document by clicking on ‘![]() ’ icon and then pressing on send button.
’ icon and then pressing on send button.
If someone initiates a chat request to you, it will show up in your Mizdah account as depicted below.

You can also use ‘Chat’ feature during meeting:
In the meeting controls toolbar, click on the “chat” icon  .
.

The “Chat panel” will get open on right side of screen.

Click the To: drop-down menu on bottom of Chat panel to select whether you want to send your message to everyone in the chat or privately to a specific participant.
Note: Your available options may be restricted by the host.

Click on the chat input field within the chat window and type your text message.

Press Enter or click the send icon ![]() to send your message.
to send your message.

Click on “attachment” icon ![]() send documents, videos, images etc from your device.
send documents, videos, images etc from your device.

33. What can be included in the chat?
Participants can ask questions or make comments related to the topic being discussed in the meeting. This can help facilitate discussions and engage participants who may not feel comfortable speaking up verbally.
Participants can provide feedback or ask questions about presentations or materials shared during the meeting. This allows for real-time interaction and clarification on key points
Participants can use the chat to communicate logistical information, such as scheduling conflicts, technical issues, or changes to meeting arrangements. This ensures that everyone stays informed and can adapt accordingly.
Participants can share links, documents, or other resources relevant to the meeting topic. This allows for collaborative work and provides additional context for discussions.
Meeting hosts or organizers can use the chat to make announcements or provide reminders about upcoming events, deadlines, or action items. This ensures that important information is communicated to all participants.
Participants can use the chat to acknowledge contributions from others, express appreciation for a job well done, or provide encouragement to fellow participants. This helps foster a positive and supportive meeting environment.
34. Where is it saved at the end of a meeting?
Chats from Mizdah meetings are saved. If you go to All Meetings, Past meetings, select the meeting whose chat you want to see and click on the chat box in the upper righthand corner, it will display the chat from that meeting. For a recurring meeting, the chat window will display all the chats from all occurrences of that recurring meeting.
35. How/where to access save chats?
Chats from Mizdah meetings are saved. To access saved chats you need to go to the All Meetings and select the meeting, whose chat you want to see and click on the chat box in the upper righthand corner. It will display the chat from that meeting. For a recurring meeting, the chat window will display all the chats from all occurrences of that recurring meeting.
36. How to setting up a Recurring meeting.?
Creating recurring meetings is a useful feature in Mizdah when you have regular or repeated meetings, such as weekly team meetings or monthly webinars. Here’s how to create recurring meetings using Mizdah.
To make the meeting recurring, you’ll need to access the “Recurring Meeting” settings:

Click on ‘Recurrence’ option and choose from Daily, Weekly or Monthly.

Then, select Repeat Every.

You can choose the “day” of your recurring meeting.

You can also select the “time” of recurring meeting.

For scheduling a meeting, click on the ‘schedule meeting’ option.
Fill all the required spaces to schedule your meeting.
37. How to specify “add to calendar”?
When you scheduled your meeting in Mizdah, Go to ‘All Meeting’ option on center or on the top of the Mizdah dashboard and select the scheduled meeting.

Then, there is an option to “Add to calendar” at the bottom of the meeting.
Clicking on this option provides users with the option to add the meeting details to their preferred calendar application, such as Outlook, Google Calendar, or Apple Calendar.

38. Where to find Mizdah Terms and Conditions and Privacy Policy?
Firstly go to Mizdah dashboard.
Click on ‘down’ arrow on the top right corner to get the ‘dropdown’ option.
Then, click on ‘User Settings’ option.
Now, click on ‘Terms and Conditions’ option on the bottom left. Here you will find the terms and conditions of Mizdah.

To check privacy policy of Mizdah, click on ‘Privacy Policy’ below Terms and Conditions.

39. How to use of All Meetings to see upcoming meeting information, past meeting?
The “All Meetings” feature provides users with an organized overview of their scheduled meetings, making it easy to manage upcoming commitments and review past meeting details.
In Mizdah dashboard, click on ‘All Meetings’ option in the center or on the top.
You will see a list of all your ‘Upcoming’ meetings.

Click on ‘Past’ option to review your previous meeting details.

40. How to Manage Participants?
In the meeting controls toolbar, click the “Participants” icon ![]() .
.
The Participants panel will open on the right side of the meeting window with all the current participants in the waiting room and the live meeting.

Click on “Mute all” option to halt discussion of all the participants.

Right side of Mute all, click the ellipses … icon to control the meeting such as Turn off videos of all, ask all to turn on audio, ask all to turn in video, stop all share screens, disable share screen for all, Enable share screen for all.

Hover over a participant’s name and click on the ellipse’s icon ⋅⋅⋅ to access options to Maximise their screen, make them Host, enable their Share Screen, disable their Share Screen, allow them to Record Meeting, move them to Waiting Area, remove them from the Meeting, Block Them from the Meeting.
